More than 2 years ago I wrote my first blog post on Deploying containers with AWS Copilot. At the time Copilot CLI was at version 0.3.0, this week version 1.22.0 was released, so I thought it was a good time to check out what’s new and how the CLI has evolved.
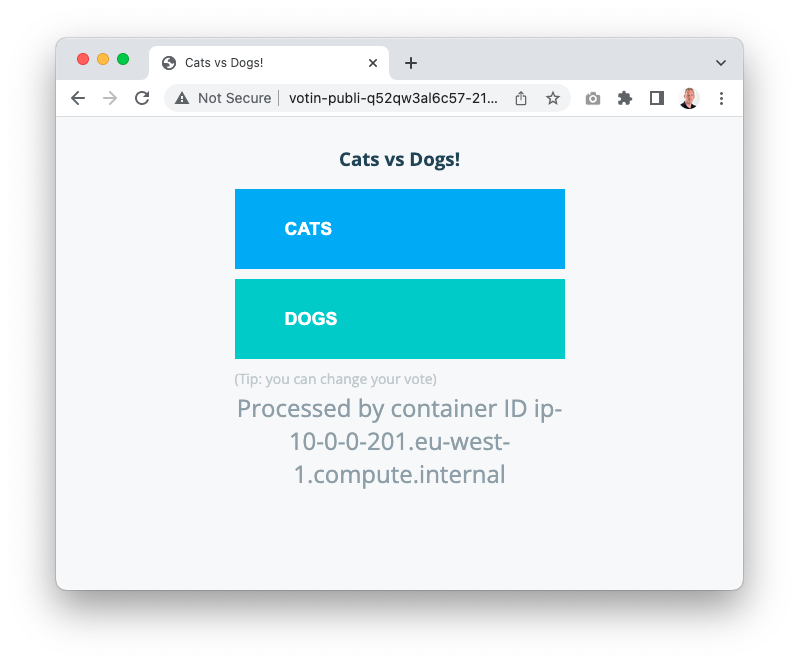
Just as in my previous post, I will use the Docker voting example app, although this time I’ll take a different approach. In post I will try to replace the Redis service with an SNS/SQS Pub/Sub pattern and the PostgreSQL Database service with the more AWS-native DynamoDB. After completing this blog the applications will run as shown below.

A short note before we start. I will not use the files from my previous post and will start from scratch using the latest version of the Docker voting example app. If you want to see all my modifications, check out the copilot/part-3 branch of this repository.
Step 1 - Download & Install
When it comes to installing the CLI not much has changed. The AWS Copilot CLI is available for both macOS and Linux and you can find the download links and installation instructions on the Github project page. If you are on a Mac you can use Homebrew to install the CLI:
brew install aws/tap/copilot-cli
Also make sure you have Docker and the AWS CLI installed. Copilot will use Docker to build and package the application we are going to deploy.
Next clone the Docker voting example app.
$ git clone https://github.com/dockersamples/example-voting-app
Cloning into 'example-voting-app'...
remote: Enumerating objects: 985, done.
remote: Counting objects: 100% (4/4), done.
remote: Compressing objects: 100% (4/4), done.
remote: Total 985 (delta 0), reused 1 (delta 0), pack-reused 981
Receiving objects: 100% (985/985), 1003.58 KiB | 3.18 MiB/s, done.
Resolving deltas: 100% (347/347), done.
Step 2 - Creating the Application and Environment
From the example-voting-app folder run the following command to create the application:
$ copilot app init voting-app

Next, initialize the test environment:
$ copilot env init --name test --default-config --profile default

And finally, deploy the test environment:
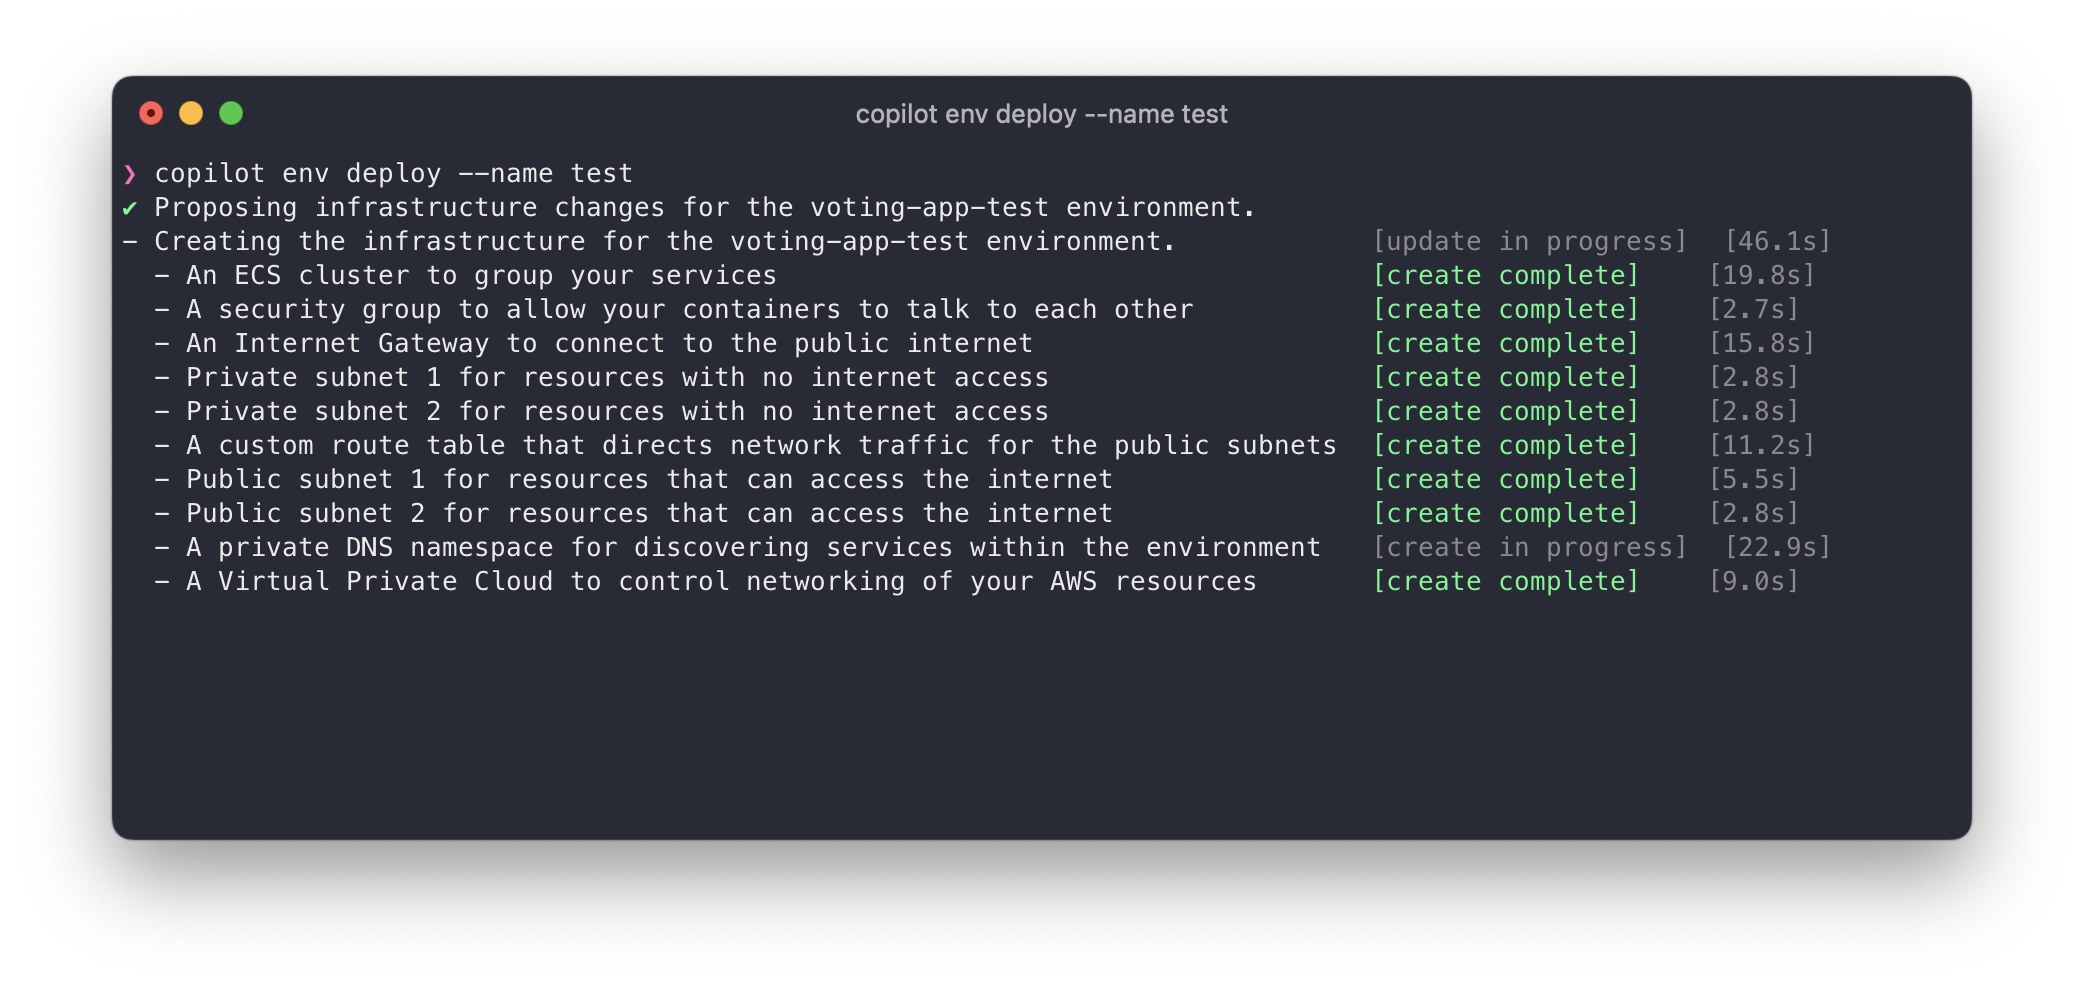
$ copilot env deploy --name test
Step 3 - Updating & Deploying the Vote service
Ok, now that we have our Application and Environment configured, the real work can start. We are going to make some modifications to the vote service. This is a front-end service that can be used to cast votes. We will modify the service so that it will send a message to a SNS topic instead of to the Redis service. Let’s start by initializing the service. We will use a Load Balanced Web Service, that will expose this service to the internet through an AWS Application Load Balancer.
$ copilot svc init --name vote --svc-type "Load Balanced Web Service" --dockerfile ./vote/Dockerfile

To add an SNS topic to this service, open the newly create copilot/vote/manifest.yaml file and add the following section:
publish:
  topics:
    - name: votes
When we deploy the service, Copilot will create a SNS topic for the service and assign the appropriate IAM permissions to the task role of the container. It will also expose the environment variable COPILOT_SNS_TOPIC_ARNS to the container, which stores a JSON-string containing all topics added to the manifest.yaml-file. In our case it will look like this:
{
  "votes": "arn:aws:sns:eu-west1:123456789012:votes",
}
Now that we know where to publish our votes, let’s update the service. I’ve replaced the parts that post messages to Redis with the following:
import boto3
topic = json.loads(os.getenv('COPILOT_SNS_TOPIC_ARNS'))['votes']
...
sns_client = boto3.client('sns')
...

if request.method == 'POST':
    vote = request.form['vote']
    app.logger.info('Received vote for %s', vote)
    data = json.dumps({'voter_id': voter_id, 'vote': vote, 'poll': poll})
    sns_client.publish(
        TargetArn=topic,
        Message=json.dumps({'default': data}),
        MessageStructure='json'
    )
For a full overview of modifications see this commit. Once done with the the modifications, you can deploy the vote service.
$ copilot svc deploy --name vote --env test

As you can see in the screenshot, Copilot picked up the changes to our manifest.yaml file and created a SNS topic for the service and deployed the container.
Step 4 - Updating & Deploying the Worker service
Now that we have deployed the vote service, we can start working on the worker service. This service will consume messages from a SQS queue and will store the results in a DynamoDB table. Let’s start by initiating the service. Copilot will detect there is a topic created already, and will ask if you want to subscribe to it. If you confirm Copilot will create a subcription on the SNS topic that will send any message to a SQS queue created for the new worker service. So select the votes topic and continue.
$ copilot svc init --name worker --svc-type "Worker Service" --dockerfile ./worker/Dockerfile

Now that we have the service initialized, we can add a DynamoDB table.
$ copilot storage init --name votes --workload worker --storage-type DynamoDB
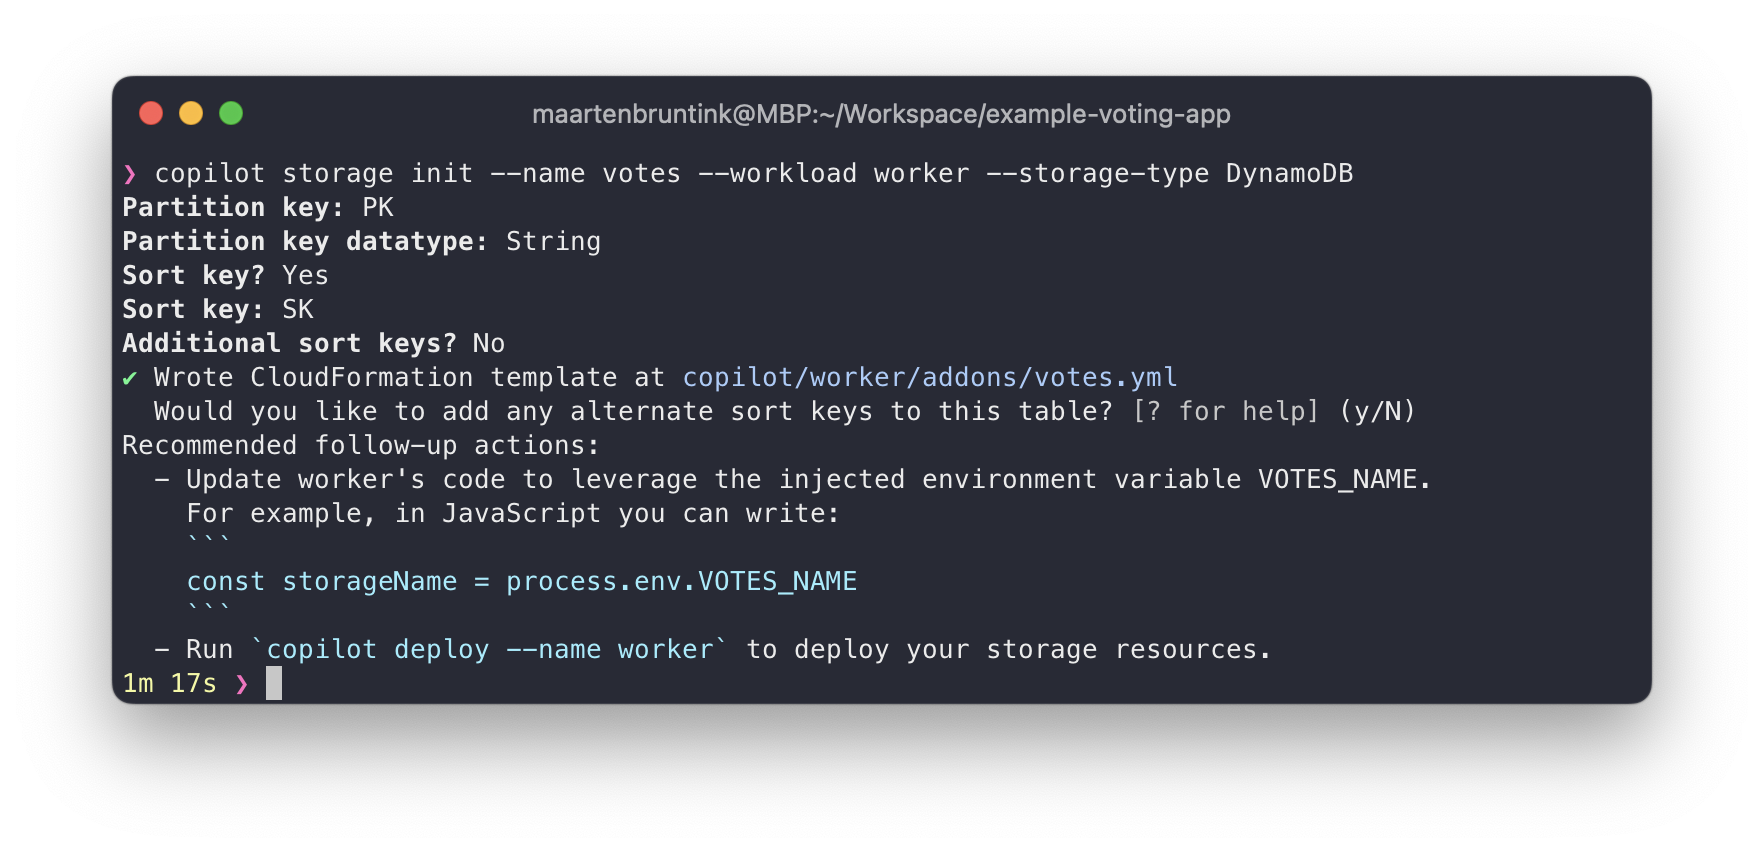
As shown in the screenshot above I named the partition key PK and the sort key SK. I will use these keys in the following data model.
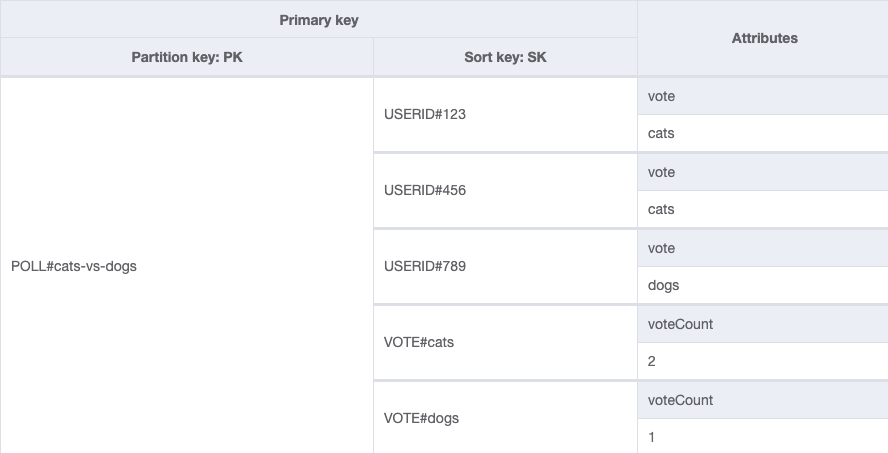
With this data model we do the following:
- Ensure each user can only cast 1 vote for each poll The composite of PK
POLL#cats-vs-dogsand SKUSERID#123must be unique. - Keep track of individual users votes We need this in case a user changes a vote. When a users casts a vote we query the table for the existence of a users in a certain poll. If no vote exists, we add it to the table. If a vote exists, we decrement the old vote count by 1 and increment the new vote 1 using DynamoDB transactions.
- Keep track of the total number of votes for a certain option As there is no option to
SELECT count()in DynamoDB we need another way to keep track of totals. Querying the PKPOLL#cats-vs-dogswith a SK that starts withVOTE#gives us all the votes and totals kept in thevoteCountattribute.
The next step is to make the needed modifications to the worker service. Note that I’m not a .NET pro, so you might spot some weird things.
First, we consume the environment variable that Copilot configured for us.
var queue = Environment.GetEnvironmentVariable("COPILOT_QUEUE_URI");
var votes_table = Environment.GetEnvironmentVariable("VOTES_NAME");
Next, we continuously monitor the SQS queue and process the messages. If the processing is successful, we’ll delete the message from the queue.
Console.WriteLine($"Reading messages from queue\n  {queue}");
do
{
    // Slow down to prevent CPU spike, only query each 100ms
    Thread.Sleep(100);
    var msg = await GetMessage(sqsClient, queue, WaitTime);
    if(msg.Messages.Count != 0)
    {
    if(await ProcessMessage(ddbClient, votes_table, msg.Messages[0]))
        await DeleteMessage(sqsClient, msg.Messages[0], queue);
    }
} while(true);
}
The ProcessMessage function uses DynamoDB transactions to ensure votes are only saved when the user has not voted before.
TransactItems = new List<TransactWriteItem>
{
    new TransactWriteItem
    {
        Put = new Put
        {
            TableName = votesTableName,
            ConditionExpression = "attribute_not_exists(PK)",
            Item = new Dictionary<string, AttributeValue>
            {
                { "PK", new AttributeValue { S = $"POLL#{vote.poll}" }},
                { "SK", new AttributeValue { S = $"USERID#{vote.voter_id}" }},
                { "vote", new AttributeValue { S = vote.vote }}
            }

        }
    },
    new TransactWriteItem
    {
        Update = new Update
        {
            TableName = votesTableName,
            Key = new Dictionary<string, AttributeValue>()
            {
                { "PK", new AttributeValue { S = $"POLL#{vote.poll}" }},
                { "SK", new AttributeValue { S = $"VOTE#{vote.vote}" }}
            },
            ExpressionAttributeValues = new Dictionary<string, AttributeValue>
            {
                { ":incr", new AttributeValue { N = "1" } }
            },
            UpdateExpression = "SET voteCount = voteCount + :incr"
        }
    }
}
If the validation of the first item fails attribute_not_exists(PK), for example on PK POLL#cats-vs-dogs and SK USERID#123, it will not execute second item. The code then catches the error and will then get the users current vote (getVoteForVoter()) and call the switchVote() function to:
- Update the
voteattribute for PKPOLL#cats-vs-dogswith SKUSERID#123fromatob. - Decrement the
voteCountattribute for PKPOLL#cats-vs-dogswith SKVOTE#aby 1. - Increment the
voteCountattribute for PKPOLL#cats-vs-dogswith SKVOTE#bby 1.
For an overview of all changed files in the worker service view this commit in the GitHub repo for this blog.
Now that we made our modifications we can deploy the service.
$ copilot svc deploy --name vote --env test
To test out if everything works browse to the ALB that was provisioned for the vote service. You can find this URL by running:
$ copilot svc show --name vote
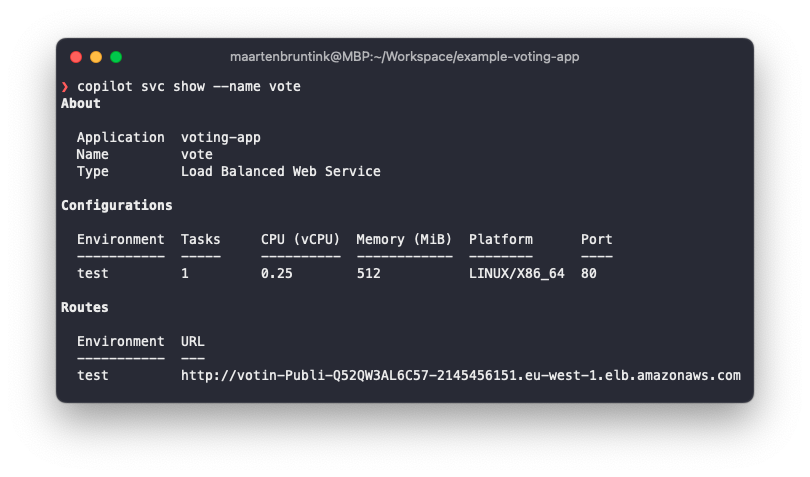
Open the provided URL and hammer the Cats or Dogs button a few times.
Now, to view the log files run:
$ copilot svc logs --name worker --env test

If you browse to the AWS DynamoDB console you can see your items there. This shows our Vote -> SNS -> SQS -> Worker -> DynamoDB flow is working.
Step 5 - Updating & Deploying the Results service
The last service to update is the results service. For this we will use a new service type, called “Request-Driven Web Service”. This service type will deploy your container to AWS App Runner. By default this service type is not connected to your VPC, but you can configure this in case you need it. We don’t need a VPC connection, since our service only consumes a DynamoDB table.
copilot svc init --name result --svc-type "Request-Driven Web Service" --dockerfile ./result/Dockerfile
I haven’t found a good way to connect the DynamoDB table we created for the worker service to other services using the manifest.yaml-file parameters. We can however use the addons folder to add custom CloudFormation templates to a service.
To do this I create a CloudFormation template called votes.yaml.
.
└── copilot
    └── result
        ├── addons
        │   └── votes.yaml <- CloudFormation template
        └── manifest.yaml
There are various resources that you can include in these templates that Copilot will automatically pick up and attach to your service. In our case, we are going to add an IAM Access Policy to grant the service read permissions to the DynamoDB table. In the below template the parameters App, Env and Name are populated by Copilot when deploying the service. When you add the votesAccessPolicy as an Output of the template, Copilot will automatically attach it to the service.
Parameters:
  App:
    Type: String
    Description: Your application's name.
  Env:
    Type: String
    Description: The environment name your service, job, or workflow is being deployed to.
  Name:
    Type: String
    Description: The name of the service, job, or workflow being deployed.
Resources:
  votesAccessPolicy:
    Metadata:
      'aws:copilot:description': 'An IAM ManagedPolicy for your service to access the votes db'
    Type: AWS::IAM::ManagedPolicy
    Properties:
      Description: !Sub Grants CRUD access to the Dynamo DB table ${App}-${Env}-${Name}-votes
      PolicyDocument:
        Version: '2012-10-17'
        Statement:
          - Sid: DDBActions
            Effect: Allow
            Action:
              - dynamodb:BatchGet*
              - dynamodb:DescribeTable
              - dynamodb:Get*
              - dynamodb:Query
            Resource: !Sub arn:aws:dynamodb:eu-west-1:022272835798:table/${App}-${Env}-worker-votes
          - Sid: DDBLSIActions
            Action:
              - dynamodb:Query
              - dynamodb:Scan
            Effect: Allow
            Resource: !Sub arn:aws:dynamodb:eu-west-1:022272835798:table/${App}-${Env}-worker-votes/index/*
Outputs:
  votesAccessPolicy:
    Description: "The IAM::ManagedPolicy to attach to the task role."
    Value: !Ref votesAccessPolicy
Now that our service has access to the DynamoDB, we can start modifying the code. After adding the AWS SDK to the project, the main change to the service is the function responsible for querying the database. The function will query the table and output the results to a socket.io channel.
function getVotes(){
  const params = {
      TableName: table,
      KeyConditionExpression: '#poll = :poll and begins_with(#vote, :vote)',
      ExpressionAttributeNames:{
        "#poll": "PK",
        "#vote": "SK"
      },
      ExpressionAttributeValues: {
        ":poll": ['POLL#', poll].join(''),
        ":vote": "VOTE#"
      }
  };
  client.query(params, (err, data) => {
      if (err) {
          console.log(err);
      } else {
          var votes = collectVotesFromResult(data.Items)
          io.sockets.emit("scores", JSON.stringify(votes));
      }
  });
  setTimeout(function() {getVotes() }, 1000);
}
For an overview of all changed files in the result service view this commit in the GitHub repo for this blog.
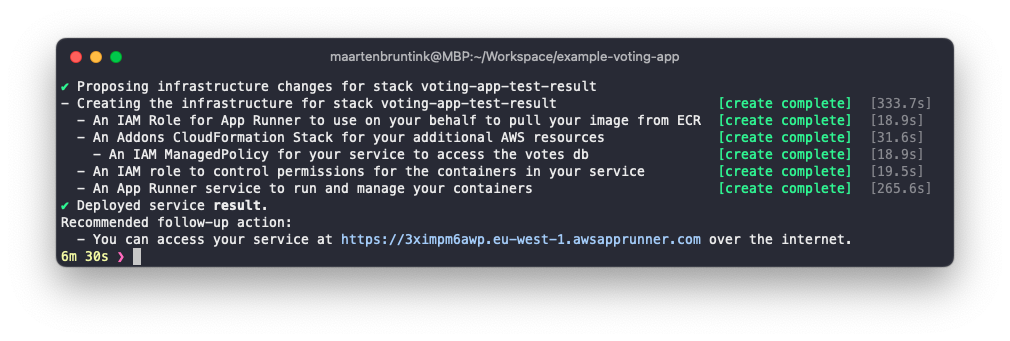
Now that we made our modifications we can deploy the service.
$ copilot svc deploy --name result --env test
Step 7 - Seeing it in Action
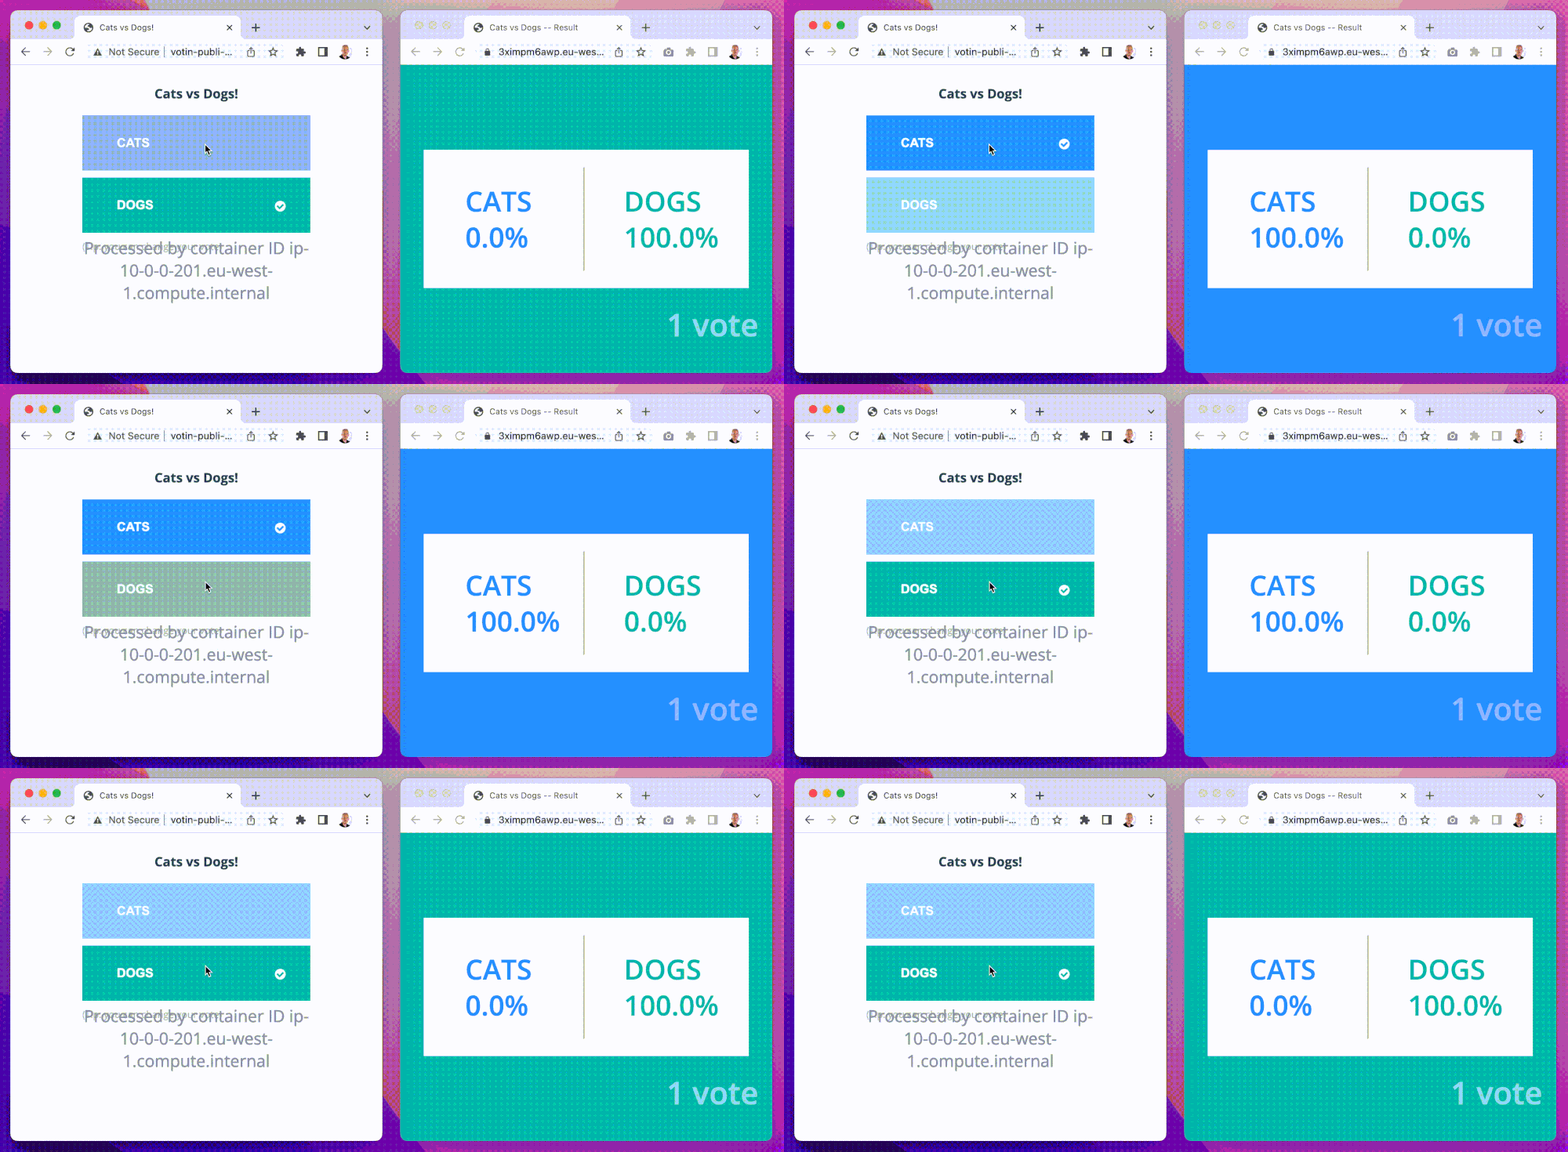
You can now open both the vote and result service side-by-side to see your tedious work in action.
Conslusion
With the Result service deployed, this post comes to an end. All the updated files can found in the copilot/part-3 branch of this repository on Github.
In this post we’ve deployed and modernized the Docker Example Vote App to AWS. The AWS Copilot CLI has evolved a lot over the past years and is still a perfect tool to quickly and simply deploy existing Docker-based application. In this post I only show you a tiny bit, so there is much to do in a upcoming post.
Thank you for reading! I hope you enjoyed this post.
P.S.: Remember to clean when you are done! Simply run the following command and Copilot will do it for you:
$ copilot app delete --yes

P.S.: I don’t really consider myself a developer, so you probably have much to say about the code changes I made. If so, please let me know, so I can also learn something from it :D.
Photo by Franz Harvin Aceituna on Unsplash
comments powered by Disqus
